Deploying to a server via SSH and Rsync in a Github Action

I wanted to use Github Actions to deploy Relayz.io — when I push a commit into Github, I want Github Actions to build my site and deploy to my Digital Ocean server.

The hardest part of this process is deploying to the server with SSH and rsync. I tried various Github actions like SSH Deploy and SSH Action, but I couldn’t get the permissions to work for A LONG TIME.

I found most articles about Github actions and SSH didn’t help me much. I got stuck with debugging for a few days before I finally figured out how to make the process work.

Today, I want to share the exact steps to deploy via rsync and SSH. This process works for any server, even if you don’t use Digital Ocean.

Step 1: Generate an SSH Key

You can generate the SSH key either on your local computer or on your server. It doesn’t matter since we can delete the key afterwards, but I recommend doing this on the server so you can reuse your SSH key for other Github Actions.

In this case we’ll SSH into the server.

ssh username@host.com

Once you’re in the server, navigate to the .ssh folder. We will generate the SSH key here.

cd ~/.ssh

When we generate the SSH Key, we cannot use the default instructions on Github’s generating an SSH key page. This is because Github Actions doesn’t support the latest Ed22159 algorithm. We need to use the legacy command instead.

use legacy command

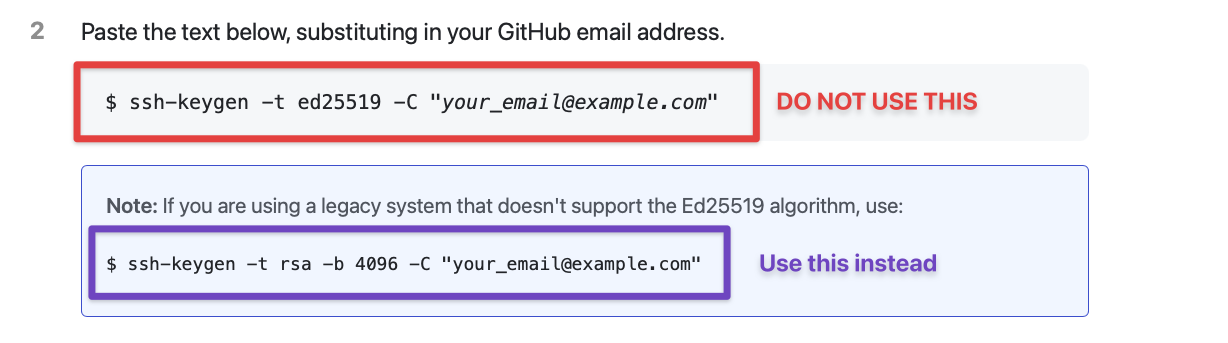
So here’s the command you need to use. Remember to replace your_email@example.com with your email address.

ssh-keygen -t rsa -b 4096 -C "your_email@example.com"

Note: Some Github Action authors said we need the PEM format for SSH keys to work. This is false. I’ve tested with the standard RSA format (which I recommended above) and it works.

Next we need to name the SSH Key file. Here, I don’t recommend using the default file name (which is id_rsa). I recommend switching the file name to github-actions so we know this key is used for Github Actions. It pays to be explicit when you view your SSH keys 6 months down the road.

name ssh key file

You’ll also be asked to provide a passphrase. Leave this empty since we can’t enter passwords when Github Actions run the SSH command for us.

leave passphrase empty

When you’re done generating your SSH keys you should get a cute image like this:

ssh key randomart image

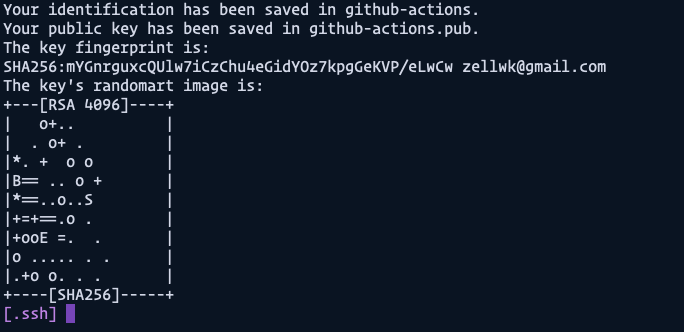
If you use the ls command now, you should see your keys in the .ssh folder.

ls

The public key contains a .pub extension while the private key doesn’t.

public key has extension .pub

Step 2: Adding the Public Key to authorized_keys

We need to add the public key (github-actions.pub) to authorized_keys so machines using the private key (github-actions) can access the server.

The easiest way is to use a cat command to append github-actions.pub into authorized_keys. It look like this:

cat github-actions.pub >> ~/.ssh/authorized_keys

Here’s what the command does:

  • Grab the contents of github-actions.pub with cat.
  • Append to ~/.ssh/authorized_keys with >>.

Note: Make sure you use double-right-angled brackets (>>) and not single-angled brackets (>). Double means append, while single means overwrite. Be careful!

Step 3: Adding the private key to your repository’s secrets

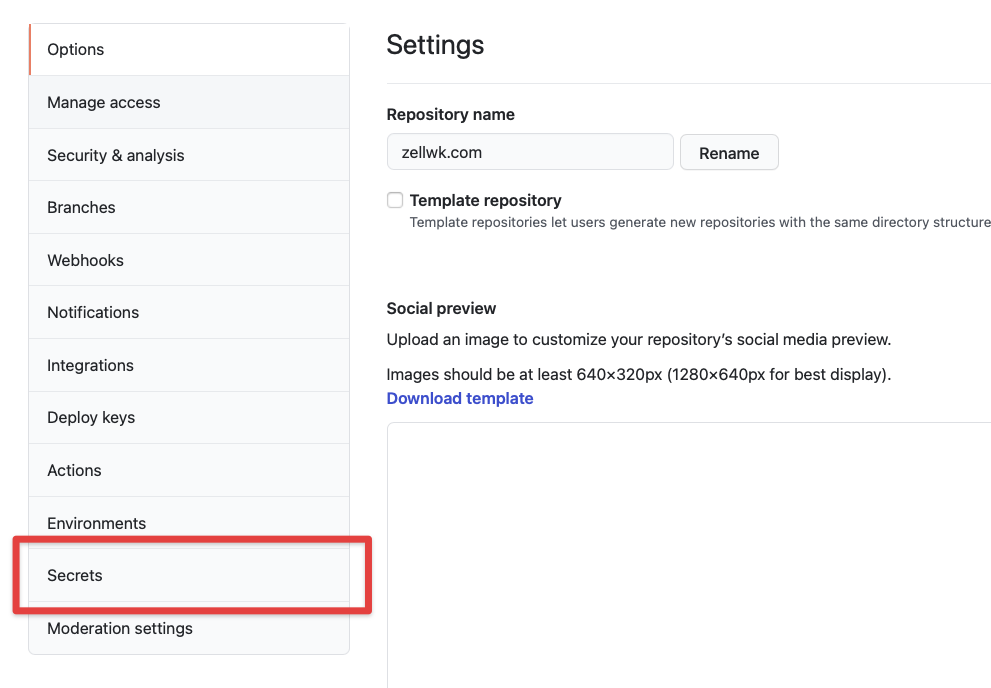
Go to your repository on Github and click on “Settings”, then “Secrets”. You should see a button that says “New repository secret”.

github settings navigation location
github secrets navigation location
new repository secret button location

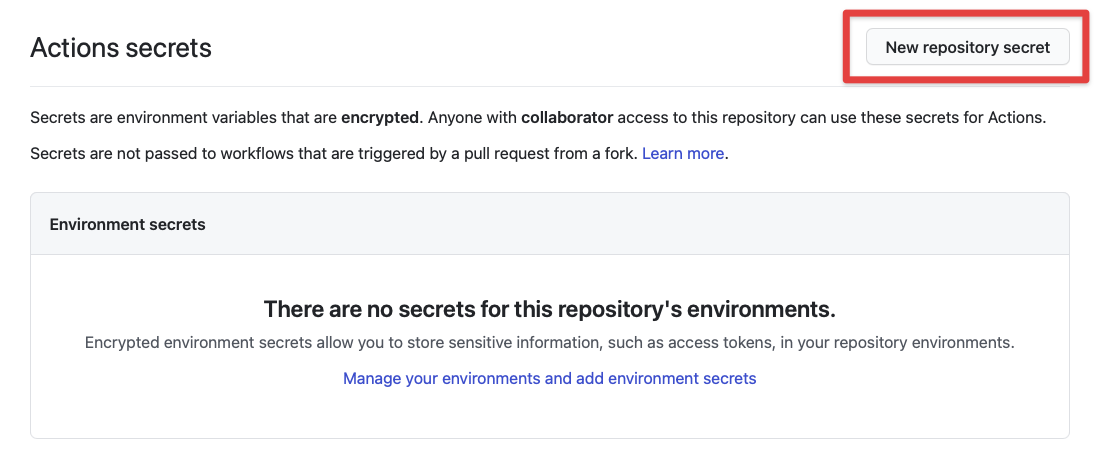
Click “New repository secret” and you’ll be prompted to enter a secret. This secret contains two things — a secret name and the contents. The secret name is used to get the contents later in a Github Actions workflow.

adding a new repository secret

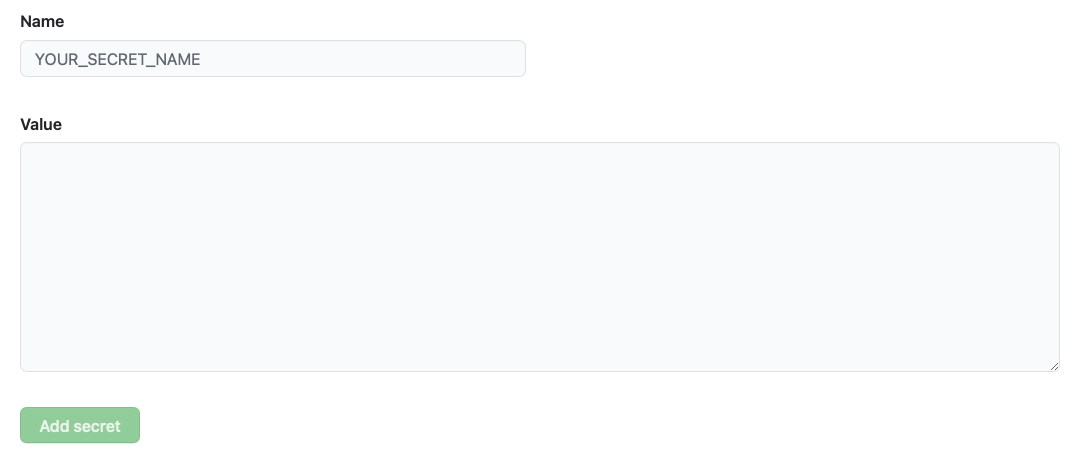
When you write your secret name, please use uppercase letters with underscores as spaces (as shown in the placeholder). This is a format we usually use for specifying secrets.

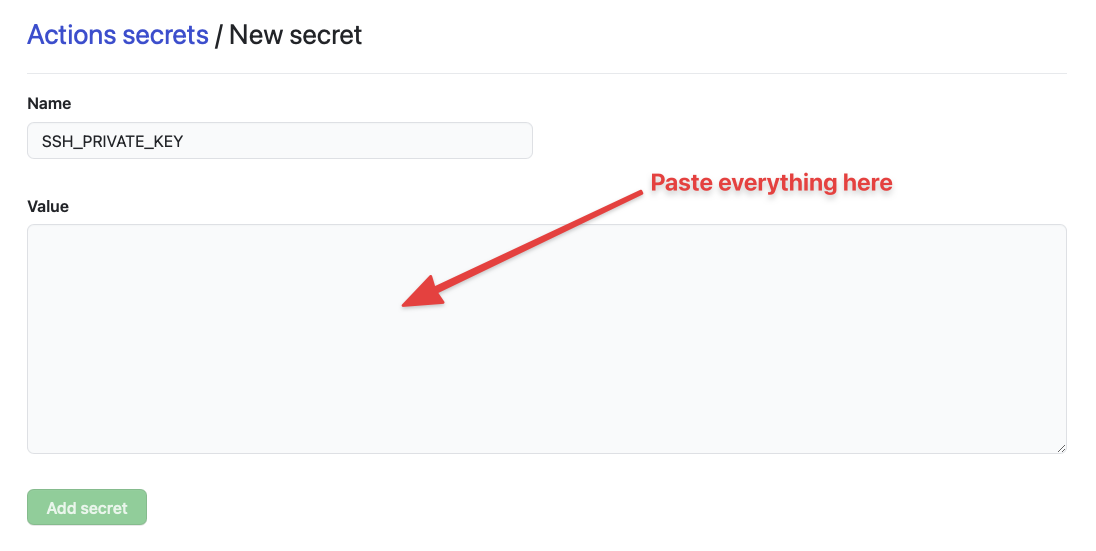
In this case, I chose to name the secret SSH_PRIVATE_KEY.

For the value, we need to go back into your server and open up the github-actions private key. We can do this with nano..

nano github-actions

You’ll see a file similar to this. (Don’t worry about me exposing this key, I trashed it already. I just wanted to show you exactly what to expect :)).

github actions private key

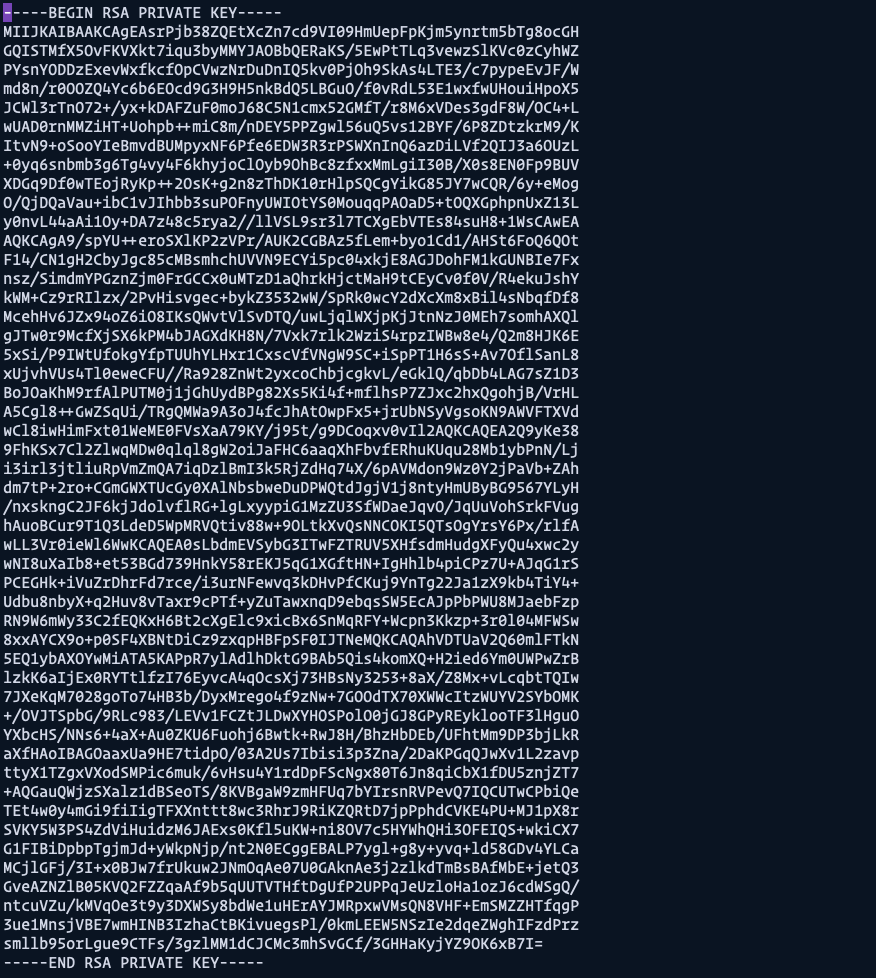
We need to copy everything and paste it inside the Secret value

paste private key inside secret value

We can use the key like this:

Next, click on “Add secret” and you’ll be brought back to the secrets page. Here, you’ll see SSH_PRIVATE_KEY under the repository’s secrets.

saved secret ssh-private-key

Step 4: Adding the Private key to a Github Actions Workflow

I’m assuming you already know how to create a basic Github Actions file, so I’ll only talk about steps for adding the SSH Key here.

Adding the private key is a complex business, I chose to look for available Github Actions here. The only action that worked for me was Shimataro’s Install SSH Key.

steps:
  - name: Install SSH Key
    uses: shimataro/ssh-key-action@v2

The Install SSH Key action requires two inputs — key and known_hosts value.

key is the private key we added to Github Secrets. We can use the secrets like this:

steps:
  - name: Install SSH Key
    uses: shimataro/ssh-key-action@v2
    with:
      key: ${{ secrets.SSH_PRIVATE_KEY }} 

The known_hosts value is a weird hashed value. If you open up a known_hosts file in the .ssh server, you’ll see something like this:

opened known hosts file

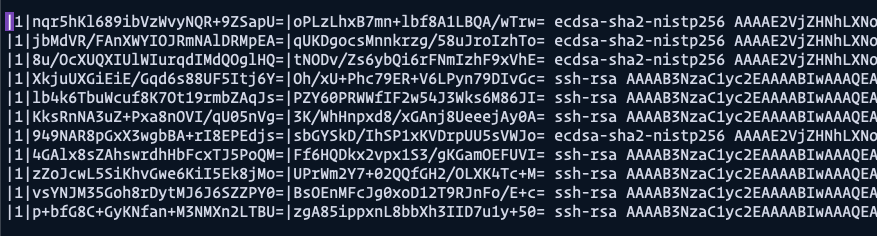
We’re supposed to add ONE of these values into a Github Actions secret. How do we even get this value in the first place?! Unfortunately, none of the Github Actions showed me how to do this, so I had to google around for a while -_-.

Thankfully, we can use a command to generate this weird hashed value. I’ll talk about this command in the next step. For now, we simply have to add a random value to known_hosts so Shimataro’s Install SSH Key won’t give us an error.

steps:
  - name: Install SSH Key
    uses: shimataro/ssh-key-action@v2
    with:
      key: ${{ secrets.SSH_PRIVATE_KEY }} 
      known_hosts: 'just-a-placeholder-so-we-dont-get-errors'

Step 5: Adding a correct known_hosts value

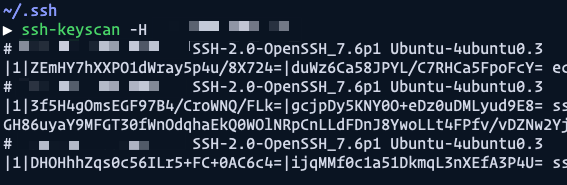
We can generate the correct known_hosts value with a ssh-keyscan command. It looks like this:

ssh-keyscan -H IP_ADDRESS_OF_HOST

If you replace IP_ADDRESS_OF_HOST with the actual ip address of your server, you should get a result like this. (I omitted my ip address but tried to show you everything else).

inserted ip address result

Once we know this, we can manually add the IP address (which I named as SSH_HOST) into the Github Secrets.

add IP address to github secrets

Then we can generate the correct information via ssh-keyscan and append it to the known_hosts file.

steps:
  # ...
  - name: Adding Known Hosts
    run: ssh-keyscan -H ${{ secrets.SSH_HOST }} >> ~/.ssh/known_hosts

Step 6: Rsync into Server

We can finally rsync via SSH into the server. To do this, you need to know your SSH user and host. Here’s what the command looks like.

rsync -flags source user@host:destination

  • flags are the flags you would like to rsync with. We commonly use avz which stands for archiveverbose, and compress. If you’re rsync-ing for the first time, I recommend using the n flag for dry-run as well.
  • source is the source file you want to copy from
  • user@host is the username and ip address of the your server. These values should be kept as secrets.
  • destination is the location of the files you want to copy to.

Here’s a real example of what I use to deploy zellwk.com to my server.

- name: Deploy with rsync
  run: rsync -avz ./dist/ ${{ secrets.SSH_USER }}@${{ secrets.SSH_HOST }}:/home/zellwk/zellwk.com/dist/

Since we have the verbose flag, you should be able to see a list of resources that are copied via rsync.

list of resources copied via rsync

Note: There are a few extra steps if you need to use rsync with a custom port. Please read this article for more information.

That’s it!

Wrapping up

Here are the steps to summarize everything:

  1. Generate a SSH Keyphrase using the standard RSA format
  2. Add the public key to authorized_keys
  3. Add the private key as a Github secret
  4. Use Shimataro’s Install SSH Key action to generate a SSH Key in the runner.
  5. Append the correct known_hosts configuration with ssh-keyscan
  6. Deploy with Rsync via SSH

Done! 🙂

Full example

A full example, used to deploy this blog, can be found here

If you enjoyed this article, please support me by sharing this article Twitter or buying me a coffee 😉. If you spot a typo, I’d appreciate if you can correct it on GitHub. Thank you!

Reference: Link

Remove Windows Phone Link

1) Open PowerShell as Administrator.

Go to Start Menu > PowerShell > Right click > Run as administrator

2) Run the following command in PowerShell and press enter:

Get-AppxPackage Microsoft.YourPhone -AllUsers | Remove-AppxPackage

3) Phone link will be removed from your device.


Reference: link

How to Sync Any Folder to OneDrive in Windows 10

How to Sync Any Folder to OneDrive in Windows 10

OneDrive is free online storage that comes included with Windows 10 and used with your Microsoft account. Save your files to OneDrive, and you’ll be able to get to them from any PC, tablet, or phone.

By default, you can choose which folders to sync in OneDrive with your PC. Windows 10 stores your OneDrive folder in your account’s %UserProfile% folder (ex: “C:\Users\Brink”) by default.

This tutorial will show you how to sync any folder to OneDrive that is not already in OneDrive for your account in Windows 10.

Here’s How:

1 Open a command prompt.

2 Type the command below into the command prompt, and press Enter. (see screenshot below)


mklink /j “%UserProfile%\OneDrive\Folder Name” “Full path of source folder”


Substitute Full path of source folder in the command above with the actual full path of the folder (ex: “F:\Example Folder”) you want to sync with your OneDrive.

Substitute Folder Name in the command above with the folder name (ex: “Example Folder”) you want to show in OneDrive. This folder is a junction point of the source folder. It would be best to use the same name as the source folder to help know what it’s linked to. This must be a new folder name that isn’t already in your OneDrive folder. This specified folder will be created in your OneDrive folder.

For example: mklink /j “%UserProfile%\OneDrive\Example Folder” “F:\Example Folder”


3 The source folder (ex: “F:\Example Folder”) will now be synced with your OneDrive (ex: “%UserProfile%\OneDrive\Example Folder”). Anything you copysave, and delete in either of these two folders will also be applied to the other folder. (see screenshots below)


If you want to undo this junction point and stop syncing the source folder with your OneDrive, you would only delete the folder (ex: “%UserProfile%\OneDrive\Example Folder”) in your OneDrive folder. This will not delete the source folder (ex: “F:\Example Folder”), but will also delete it from your online OneDrive.


(Source folder location)


(OneDrive locations)


That’s it,
Shawn


Source:
https://www.tenforums.com/tutorials/92892-sync-any-folder-onedrive-windows-10-a.html

Other Ways:

https://inclowdz.wondershare.com/cloud-manage/add-folder-to-onedrive.html

Bluetooth mouse lag

Under driver properties in device manager, click on the power management tab and de-select the option for the computer to turn the bluetooth card off to save power. This solved all of my issues with the lagging keyboard, and I’m hoping it might help you guys out as well.

Cheers!

References:
https://www.dell.com/community/Laptops-General-Read-Only/Bluetooth-mouse-lag/td-p/3882197

https://www.dell.com/community/Laptops-General-Read-Only/Bluetooth-mouse-lag/m-p/3882226#M653374

What is Lean Coffee?

Lean Coffee is a wonderful format for people to quickly organize a conversation on topics that are most relevant for who shows up.

If you have never attended a lean coffee, I suggest you first view Jim Benson’s 3 minute video (Jim co-created this meeting format).

For facilitation details, you could read any of the following

Why use Lean Coffee?

I’ve used lean coffee to reboot Agile Orlando, to run multiple team retrospectives, for meet-and-greets for potential new collaborators, and to crowd-source ideas for future talks.

However, one of my favorite ways to use lean coffee is to connect people across an organization or community who would not normally bump into each other.  Jason Little does a great job of explaining how this can be used for organization change in his book, Lean Change Management.

Virtual Lean Coffee?  Can this work online?

Absolutely!  I started to run virtual lean coffee discussions online in 2013 when I wanted to connect with other agile coaches and discuss topics of interest to us.  I developed and evolved a virtual lean coffee template for using Google Docs.

If you are looking to run your own virtual lean coffee, consider that your tools should support:

  1. creating cards
  2. add and edit text on cards
  3. group cards together (to make it easier to find similar topics)
  4. vote on cards
  5. sort cards by vote (auto-prioritize)
  6. move cards between columns (when the group is ready to start or end discussion.
  7. To have an adjustable timer that anyone (or just the facilitator) can control – you may choose a shorter timebox if you are continuing a conversation on topic once or twice
  8. To record epiphanies or decisions
  9. To record actions from any of the cards

There are a few online tools that now provide this functionality.

(*) – indicates I have not used this tool … yet

Most sticky-note apps can support 1-3 and some will support 4.  However, these new set of tools may be worth looking at because the other features (5-9) can be big time savers if you are running multiple virtual lean coffees per month for multiple groups.

Source: https://mckilby.wordpress.com/virtual-lean-coffee/

Simple Cache Helper Class


namespace MyApp.Helpers
{
    using System;
    using System.Runtime.Caching;
    using System.Threading;
    ///
    /// This Static Class Helper you to cache objects.
    /// This use a System.Runtime.Caching.MemoryCache as base.
    ///
    /// T is Type of value you want by cached.
    public static class CacheHelper{
        ///
        /// The cache key.
        ///
        private const string CacheKey = "MyCode.CacheHelper.Key";
        ///
        /// The cache lock.
        ///
        private static readonly ReaderWriterLockSlim CacheLock = new ReaderWriterLockSlim();
        ///
        /// This method stores a value in the cache for a given time.
        ///
        ///Key of your cache. ///Duration of cache. ///Delegate function representing the value you want cache. /// Generic type cached.
        public static T GetCachedData(string key, DateTimeOffset offset, Func cacheObject) {
            var fullKey = string.Concat(CacheKey, ".", key);
            // First we do a read lock to see if it already exists, this allows multiple readers at the same time.
            CacheLock.EnterReadLock();
            try {
                // Returns null if the string does not exist, prevents a race condition where the cache invalidates between the contains check and the retrieval.
                if (MemoryCache.Default.Get(fullKey, null)is T cachedString) {
                    return cachedString;
                }
            }
            finally {
                CacheLock.ExitReadLock();
            }
            // Only one UpgradeableReadLock can exist at one time, but it can co-exist with many ReadLocks
            CacheLock.EnterUpgradeableReadLock();
            try {
                // We need to check again to see if the string was created while we where waiting to enter the EnterUpgradeableReadLock
                if (MemoryCache.Default.Get(fullKey, null)is T cachedString) {
                    return cachedString;
                }
                // The entry still does not exist so we need to create it and enter the write lock
                CacheLock.EnterWriteLock(); // This will block till all the Readers flush.
                try {
                    var cacheItem = cacheObject(); // Call
                    CacheItemPolicy cip = new CacheItemPolicy {
                        AbsoluteExpiration = offset
                    };
                    MemoryCache.Default.Set(fullKey, cacheItem, cip);
                    return cacheItem;
                }
                finally {
                    CacheLock.ExitWriteLock();
                }
            }
            finally {
                CacheLock.ExitUpgradeableReadLock();
            }
        }
    }
}

WCF Tools | Service Trace Viewer Tool

SvcTraceViewer

Windows Communication Foundation (WCF) Service Trace Viewer Tool helps you analyze diagnostic traces that are generated by WCF. Service Trace Viewer provides a way to easily merge, view, and filter trace messages in the log so that you can diagnose, repair, and verify WCF service issues.

Configuring Tracing

Diagnostic traces provide you with information that shows what is happening throughout your application’s operation. As the name implies, you can follow operations from their source to destination and through intermediate points as well.

You can configure tracing using the application’s configuration file—either Web.config for Web-hosted applications, or Appname.config for self-hosted applications. The following is an example:


Source: https://docs.microsoft.com/en-us/dotnet/framework/wcf/service-trace-viewer-tool-svctraceviewer-exe?redirectedfrom=MSDN

Rijndael Managed Class | AES Encrypt


Accesses the managed version of the Rijndael algorithm. This class cannot be inherited.

[System.Runtime.Versioning.UnsupportedOSPlatform("browser")]
public sealed class RijndaelManaged : System.Security.Cryptography.Rijndael
 

Examples

The following example demonstrates how to encrypt and decrypt sample data using the RijndaelManaged class.

using System;
using System.IO;
using System.Security.Cryptography;

namespace RijndaelManaged_Example
{
    class RijndaelExample
    {
        public static void Main()
        {
            try
            {

                string original = "Here is some data to encrypt!";

                // Create a new instance of the RijndaelManaged
                // class.  This generates a new key and initialization
                // vector (IV).
                using (RijndaelManaged myRijndael = new RijndaelManaged())
                {

                    myRijndael.GenerateKey();
                    myRijndael.GenerateIV();
                    // Encrypt the string to an array of bytes.
                    byte[] encrypted = EncryptStringToBytes(original, myRijndael.Key, myRijndael.IV);

                    // Decrypt the bytes to a string.
                    string roundtrip = DecryptStringFromBytes(encrypted, myRijndael.Key, myRijndael.IV);

                    //Display the original data and the decrypted data.
                    Console.WriteLine("Original:   {0}", original);
                    Console.WriteLine("Round Trip: {0}", roundtrip);
                }
            }
            catch (Exception e)
            {
                Console.WriteLine("Error: {0}", e.Message);
            }
        }
        static byte[] EncryptStringToBytes(string plainText, byte[] Key, byte[] IV)
        {
            // Check arguments.
            if (plainText == null || plainText.Length <= 0)
                throw new ArgumentNullException("plainText");
            if (Key == null || Key.Length <= 0)
                throw new ArgumentNullException("Key");
            if (IV == null || IV.Length <= 0)
                throw new ArgumentNullException("IV");
            byte[] encrypted;
            // Create an RijndaelManaged object
            // with the specified key and IV.
            using (RijndaelManaged rijAlg = new RijndaelManaged())
            {
                rijAlg.Key = Key;
                rijAlg.IV = IV;

                // Create an encryptor to perform the stream transform.
                ICryptoTransform encryptor = rijAlg.CreateEncryptor(rijAlg.Key, rijAlg.IV);

                // Create the streams used for encryption.
                using (MemoryStream msEncrypt = new MemoryStream())
                {
                    using (CryptoStream csEncrypt = new CryptoStream(msEncrypt, encryptor, CryptoStreamMode.Write))
                    {
                        using (StreamWriter swEncrypt = new StreamWriter(csEncrypt))
                        {

                            //Write all data to the stream.
                            swEncrypt.Write(plainText);
                        }
                        encrypted = msEncrypt.ToArray();
                    }
                }
            }

            // Return the encrypted bytes from the memory stream.
            return encrypted;
        }

        static string DecryptStringFromBytes(byte[] cipherText, byte[] Key, byte[] IV)
        {
            // Check arguments.
            if (cipherText == null || cipherText.Length <= 0)
                throw new ArgumentNullException("cipherText");
            if (Key == null || Key.Length <= 0)
                throw new ArgumentNullException("Key");
            if (IV == null || IV.Length <= 0)
                throw new ArgumentNullException("IV");

            // Declare the string used to hold
            // the decrypted text.
            string plaintext = null;

            // Create an RijndaelManaged object
            // with the specified key and IV.
            using (RijndaelManaged rijAlg = new RijndaelManaged())
            {
                rijAlg.Key = Key;
                rijAlg.IV = IV;

                // Create a decryptor to perform the stream transform.
                ICryptoTransform decryptor = rijAlg.CreateDecryptor(rijAlg.Key, rijAlg.IV);

                // Create the streams used for decryption.
                using (MemoryStream msDecrypt = new MemoryStream(cipherText))
                {
                    using (CryptoStream csDecrypt = new CryptoStream(msDecrypt, decryptor, CryptoStreamMode.Read))
                    {
                        using (StreamReader srDecrypt = new StreamReader(csDecrypt))
                        {
                            // Read the decrypted bytes from the decrypting stream
                            // and place them in a string.
                            plaintext = srDecrypt.ReadToEnd();
                        }
                    }
                }
            }

            return plaintext;
        }
    }
}

Remarks

This algorithm supports key lengths of 128, 192, or 256 bits; defaulting to 256 bits. In .NET Framework, this algorithm supports block sizes of 128, 192, or 256 bits; defaulting to 128 bits (Aes-compatible). In .NET Core, it is the same as AES and supports only a 128-bit block size.

 Important

The Rijndael class is the predecessor of the Aes algorithm. You should use the Aes algorithm instead of Rijndael. For more information, see the entry The Differences Between Rijndael and AES in the .NET Security blog.


Source: http://msdn.microsoft.com/en-us/library/system.security.cryptography.rijndaelmanaged.aspx

Introduction to ASP.NET Web Programming ASP.NET Core Razor Pages web app


This is the first tutorial of a series that teaches the basics of building an ASP.NET Core Razor Pages web app.

For a more advanced introduction aimed at developers who are familiar with controllers and views, see Introduction to Razor Pages.

At the end of the series, you’ll have an app that manages a database of movies.

View or download sample code (how to download).

In this tutorial, you:

  • Create a Razor Pages web app.
  • Run the app.
  • Examine the project files.

(…)

Continue : https://docs.microsoft.com/en-us/aspnet/core/tutorials/razor-pages/razor-pages-start?view=aspnetcore-5.0&tabs=visual-studio